Beat the Heat with These Healthy Frozen Summer Treats!
Summer is here, and what better of a time to make some healthy homemade frozen treats that you and your family can enjoy! We wanted to find ways to beat the summer heat and still keep it nutritious.
Let’s take some everyday frozen favourites. We’ll be using ingredients that are better for you than their conventional counterparts. Not to mention our’s won’t have any added refined sugars. Below you will find four delicious recipes that aim to satisfy your sweet tooth while providing a healthy dose of nutrition at the same time!
Don’t forget to share them with us by tagging @naturescanada
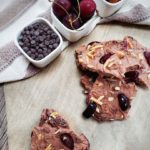
Cherry & Almond Chocolate Frozen Yogurt Bark
Ingredients
- 3 cups vanilla Greek yogurt or use plain and sweeten with honey
- 3 tbsp unsweetened cocoa powder
- ½ cup slivered almonds plus one tablespoon
- ½ cup organic cherries plus one tablespoon
- ¼ cup semi-sweet chocolate chips
- ¼ tsp Nature’s Emporium Coconut Oil
Instructions
- Preheat oven to 400°F and prepare a baking sheet with parchment paper.
- Place slivered almonds on the baking sheet and toast for approximately 5-8 minutes or until golden brown, ensure they do not burn, set aside and cool.
- Prepare a baking sheet with parchment paper to use for the bark and be able to freeze once prepared.
- In a double boiler, melt chocolate chips with coconut oil until fully melted and set aside.
- In a large bowl, mix together yogurt and cocoa powder until fully combined.
- Then, mix in ½ cup of toastedslivered almonds and ½ cup of slivered cherries until fully combined.
- Carefully pour the mixture onto parchment paper of the baking sheet and spread evenly, approximately 1-1 ½ cm thick.
- Using a spoon, drizzle melted chocolate on top, using a spatula spread out evenly while still seeing the chocolate drizzle.
- Using the remaining tablespoon of slivered almonds and tablespoon of slivered cherries, drizzle over the mixture evenly.
- Place in the freezer for 4 hours or overnight. Remove and cut into chunks using a sharp knife. Enjoy!
Notes
Nutrition
In previous recipes shared, we’ve used many different alternative flour options, but one we have yet to bring up is spelt flour. It’s an ancient grain rich in nutrients (rich in calcium, manganese, magnesium, iron, selenium and niacin). Though it is not gluten-free, and is technically a variety of wheat, it does tend to be more digestible for most individuals.
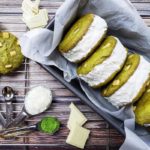
Matcha & White Chocolate Coconut Ice Cream Sandwiches
Ingredients
For the cookies:
- 2 cups light spelt flour* see notes for gluten-free option
- 1 tbsp Do Matcha Ceremonial-Grade Matcha Powder suitable for baking
- ½ tsp baking soda
- ¼ tsp Celtic Sea Salt
- ¾ cup coconut sugar
- ½ cup cane sugar
- ½ cup butter alternative (we used Earth Balance Buttery Spread, adjust accordingly) melted
- 1 tbsp vanilla extract
- 1 Nature's Emporium Egg
- 1 Nature's Emporium Egg Yolk
- 2 bars Olivia Chocolate Artisan Vegan White Chocolate Bar with Coconut chopped
For the ice cream sandwiches:
- 12 large scoops Luna & Larry’s Coconut Bliss Naked Coconut Ice Cream
Instructions
- Preheat oven to 325°F and prepare a baking sheet with parchment paper.
- Sift the flower into a small bowl. Then, add matcha, baking soda, and salt and mix together until flour turns light green.
- In a separate bowl, beat the brown sugar, cane sugar and earth balance with an electric mixer until blended.
- Mix the flour mixture into the creamed butter mixtureuntil the dough is blended. Do not over mix.
- Fold in the white chocolate until thoroughly combined.
- Place cookie dough onto baking sheet about 2 inches apart using approximately one heaping tablespoon per cookie.
- Bake 15-18 minutes or until edges are lightly browned, then cool cookies for a few minutes on a baking sheet and transfer to a rack to completely dry.
- Once completely cooled, add a large ice cream scoop of slightly melted Coconut Bliss Ice Cream between two sandwiches, spread evenly to cover the entire cookie.
- Place another cookie on top, gently press together between your palms to form the sandwich, then wrap tightly in plastic wrap and freeze for 3 hours or overnight.
Notes
Nutrition
A fruity popsicle on a hot summer day is so crucial to keeping cool and quenching your thirst! Growing up, there was nothing better than biting into your favourite freezie colour and sitting on the dock at the cottage. At the same time, you take a break from swimming. However, unfortunately knowing what there is to know now about freezies and how much added sugar is in them, one wouldn’t be so inclined to grab one. Most added sugars in conventional products tend to spike our blood glucose levels. This spike sends our bodies on a wild rollercoaster of side effects. Over time, eventual long term issues occur.
Thankfully, making your own popsicles is a simple task. They require few ingredients and can be made quickly. It’s the freezing part that delays eating them! They still may contain some sugars when looking at the nutrition facts provided. However, we are making these solely with fruit and real fruit juice. Therefore, added sugars—especially refined white sugar, are not needed. They will still taste great and refreshing!
We’ve also helped to reduce the impact on your blood sugar. This is done by adding some chia seeds, which are excellent sources of protein, fibre and fat. All of which help to slow the digestion of sugars and reducing the impact on our blood sugar.
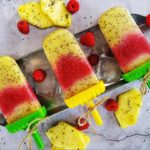
Raspberry & Pineapple Popsicles
Equipment
- Popsicle molds
Ingredients
- 2 cups organic raspberries
- 1 tbsp coconut water
- 2 ½ cups organic pineapple diced
- 1 tbsp pineapple juice
- 1 tbsp chia seeds
Instructions
- In a food processor, blend raspberries with a little coconut water until you get a smooth puree. Start with 1 tbsp of coconut water and increase until you reach the desired consistency.
- Then, move the puree into a bowl or cup with a spout to make it easier for pouring.
- Rinse the bowl and blend the pineapple with pineapple juice. Again, start with 1 tbsp of pineapple juice and increase until you reach your desired consistency.
- Using the popsicle molds, layer the raspberry and pineapple purees.
- Freeze overnight and enjoy it as a refreshing treat on a hot summer day!
Nutrition
The reason these ingredients are usually included in conventional brands is because they create a longer shelf life. They also allow for a precise consistency or texture of the product. That might sound great in the grand scheme of things. Still, ultimately these preservatives and additives can often be harmful to our health. Holistic nutritionists prefer to keep things a lot more whole and straightforward in their diets. That’s where this delicious Nana Ice Cream comes in!
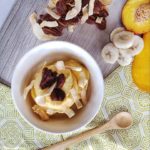
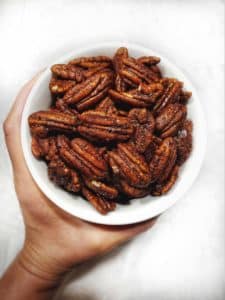
Bananas are such a super fruit, and they are not only rich in nutrients. The texture of them when you freeze them is similar to that of ice cream. It can definitely be a good substitute when you’re looking to clean up your diet, but still want the satisfying treat of ice cream. We’ve paired bananas with frozen peaches and mango, topped it with coconut flakes, and our all-time favourite candied pecan recipe. These pecans are so good that they can be enjoyed as a snack on their own. Try topping them on a salad or used in another dessert. Think cookies, brownies or pies! They have endless uses, so you can always make a double batch and store them in a mason jar in the fridge for about a week!
Peach & Mango ‘Nana Ice Cream Topped With Candied Pecans
Ingredients
For the candied pecans:
- 1 Nature's Emporium Egg White
- 1 tbsp water
- ¼ tbsp vanilla extract
- 1 cup organic pecans
- 3 tbsp coconut sugar
- 1 tsp Nature's Emporium Cinnamon
- ¼ tsp Celtic Sea Salt
- ⅛ tsp nutmeg
For the banana ice cream:
- 1 cup frozen peaches
- 1 cup frozen mangoes
- 1 cup frozen bananas
- ¼ cup coconut chips
Instructions
For the 'nana ice cream
- Begin by peeling and slicing the bananas to freeze for at least 4 hours or overnight.
- In a food processor or high-speed blender, blend together the bananas, peaches, and mangos.
- Process the fruit until smooth. It will look like crumbles at first but eventually blends to a smooth consistency.
- Serve immediately or freeze leftovers and enjoy for a later time.
- Keep cool in freezer and proceed to make candied pecans.
For the candied pecans:
- Preheat the oven to 250°F. Line a baking sheet with parchment paper.
- Mix together egg white, water and vanilla extract in a bowl and beat until foamy. Pour in pecans and coat thoroughly.
- Mix coconut sugar, cinnamon, salt and nutmeg in a plastic bag. Shake together to combine.
- Add in pecans using a slotted spoon to remove excess egg white mixture and shake it really well to ensure all pecans are coated with the dry mix.
- Place on parchment paper and bake for 25-30 minutes. Cool & top your 'nana ice cream!
Nutrition
We hope you’ve been inspired to take your traditional favourite frozen treats and amplify them to the next level with some easy tweaks and healthy ingredients. Here’s to enjoying some sweet treats in the heat this summer!
Don’t forget to share your creations with us tagging @naturescanada always!

