Easter is just around the corner, and it will undoubtedly be different this year. However, that doesn’t mean we can’t bring a little Easter cheer to your Easter weekend!
We’ve put together some fun Easter recipes! You and your children can make these together. Let’s show our holiday spirit!
Not to mention, it’s something to keep busy with. We’re sure the long days at home with the kids can be routine. Even mundane at times. You and your children might be losing patience at this point.
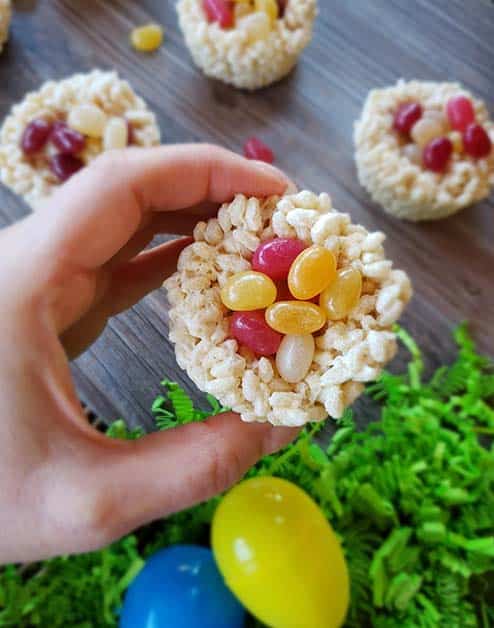
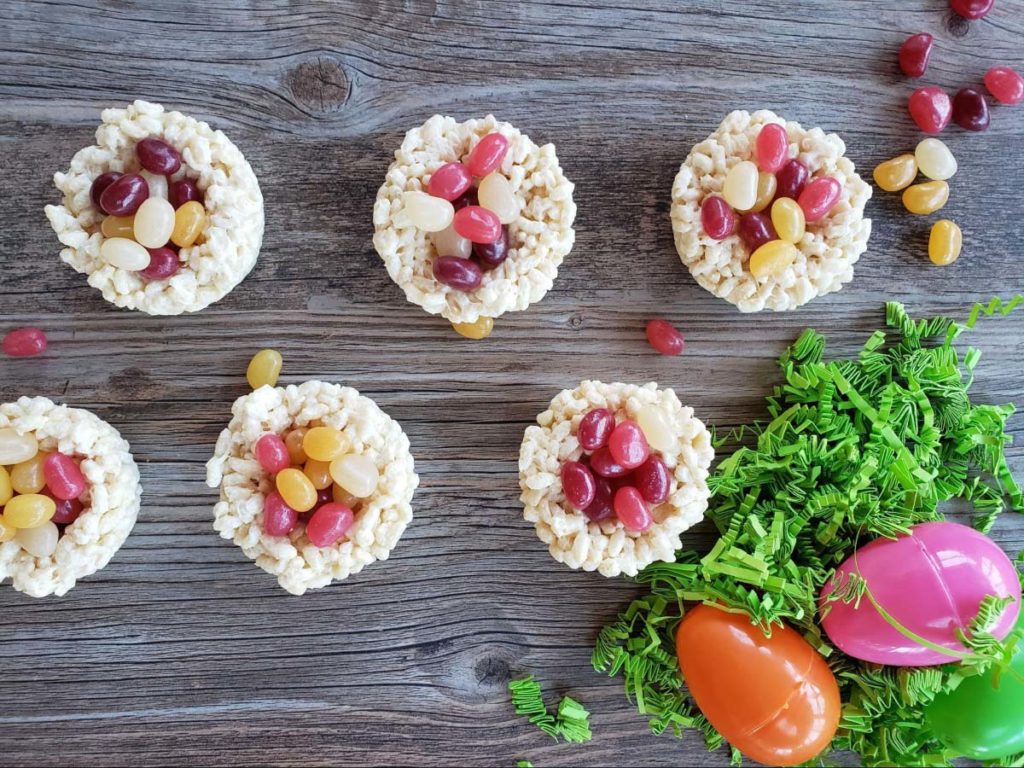
Crispy Rice Birds Nests
This is a fun and simple way to get your kiddies creative in the kitchen. It’s a sensory experience because of having to mould the nests. You can make it a bit of a math lesson as well. Try having them count out the candy you chose to put in the nests!

Crispy Rice Birds Nests
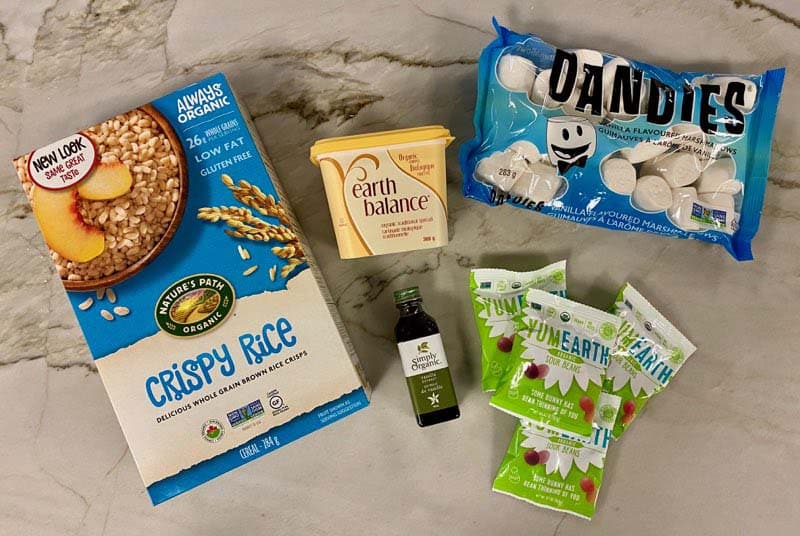
Ingredients
- 10 oz Dandies Mini Marshmallows (one bag)
- 3 tbsp Earth’s Balance Organic Buttery Spread (or grass-fed butter)
- 1 tsp Simply Organic Vanilla Extract
- 5 cups Nature’s Path Crispy Rice Cereal
- Yum Earth Organic Sour Beans (or jelly beans or chocolate covered almonds, or a treat of your choice)
Instructions
- In a large pot or saucepan, melt the buttery spread or butter over low heat.
- Once buttery spread/butter is melted, add in marshmallows and stir quickly until the mixture is completely melted.*Note: Have patience and stick with it, these marshmallows take a little longer to melt than traditional marshmallows*
- Remove from heat and add in the vanilla and stir until combined.
- Add the crispy rice cereal. Mix until everything is combined well.
- After the mixture has cooled, put a bit of buttery spread or butter on your fingertips, take a small amount of the crispy rice mixture and mould into the shape of bird nests.
- Fill each nest with a few beans (or treat of your choice).
And voilà!
Deviled Egg Baby Chicks
This is a cute and fun snack for Easter weekend with a festive flair! They whip up very similar to regular deviled eggs but are cut and filled a little differently.
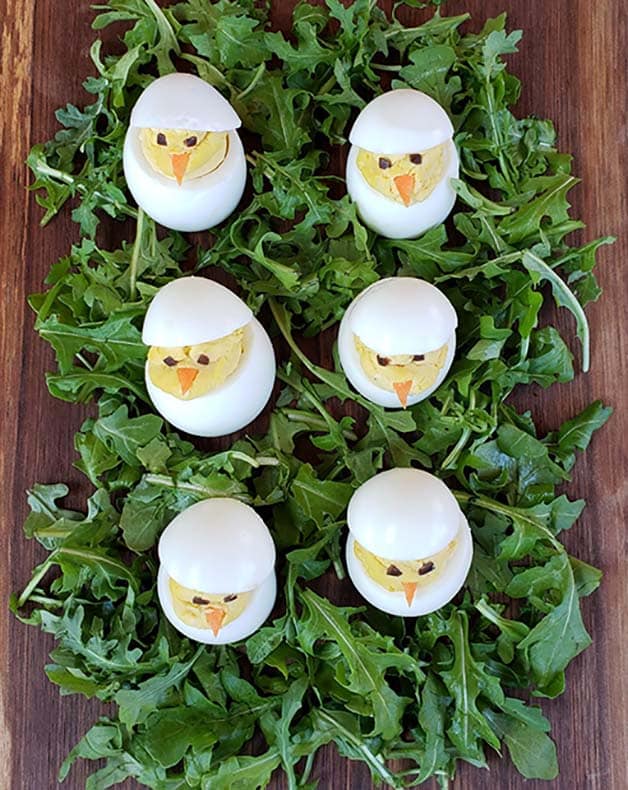
Deviled Egg Baby Chicks
Ingredients
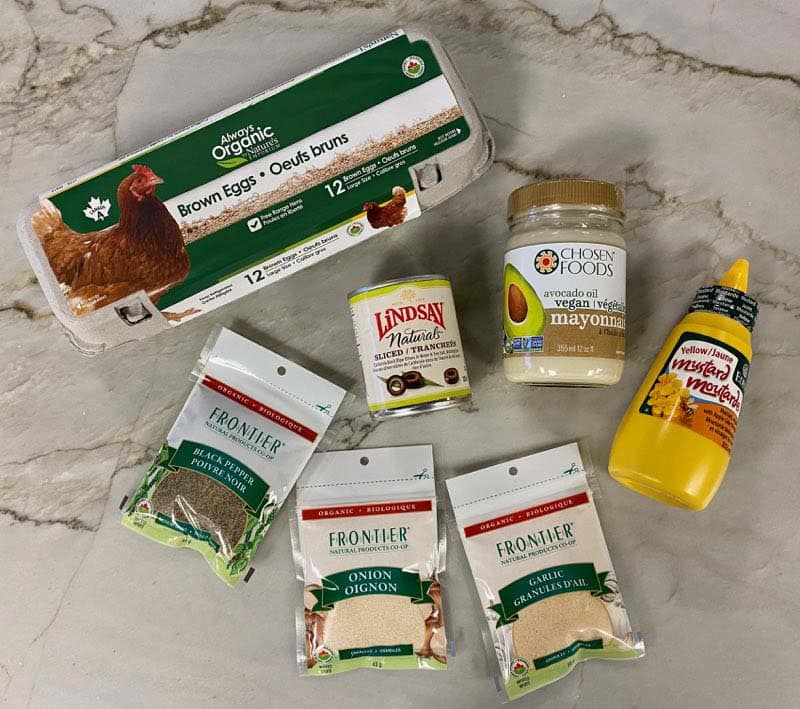
- 1 dozen Nature’s Emporium Organic Eggs
- ¼ cup Chosen Foods Avocado Mayonnaise
- ½ tbsp Eden Yellow Mustard
- 1 tsp Sunshine Farms Organic White Vinegar (or a distilled vinegar)
- ¼ tsp finely ground Black or White Pepper
- ¼ tsp finely ground Sea Salt
- ⅛ tsp Onion Powder
- ⅛ tsp Garlic Powder
- Lindsey Naturals Sliced Black Olives (used for eyes)
- Organic Baby Carrots (used for beaks)
- Piping Bag or Plastic Baggy
Instructions
Preparing and Cooking the Eggs
- Hard boil the eggs: Fill a large pot with water and a splash of white vinegar and boil on the stovetop over high heat. Once water is boiling, add in the dozen eggs carefully so they do not crack (you can use a large slotted spoon to lower the egg in).
- Cook for 10 minutes. Do not over cook as this will cause the outer layer of the yolk to turn grey/green. To help avoid this more, be sure to put eggs in ice cold water as soon as they are removed from the stove.
- Once eggs are completely cooled, cut a very thin layer of the bottom off so the egg can sit standing up. You will then need to make an additional cut about ¼ from the top of the egg. Do not discard this part of the egg as it will be put back on top once eggs are filled. Repeat with the remaining eggs.
Making the Filling
- Remove all yolks from the eggs carefully so the structure of the egg is not damaged (depending on the age of your child, it may be best for you to take the reins on this part) and place yolks into a mixing bowl.
- Mash up the yolks using a spatula, and add the mayonnaise, mustard, white vinegar, pepper, salt, onion powder and garlic powder. Mix thoroughly until combined well (if the mixture is too thick, add a bit more mayonnaise until the desired consistency is reached – you do not want it to be too runny otherwise the shape of the yolk will not hold).
Finishing Up
- Fill your piping bag or plastic baggy (cut the tip off so you create your own piping bag) with the yolk mixture and pipe it into each of the hole openings in the eggs, makings sure that enough comes out to act as the chick head.
- Once all eggs are filled, place the remaining cut portion back on top of the yolk, being careful not to squish it.
- Cut small eyes from the black olives and a nose from the shredded carrots and add them to each deviled egg chicky.
And you’re done!

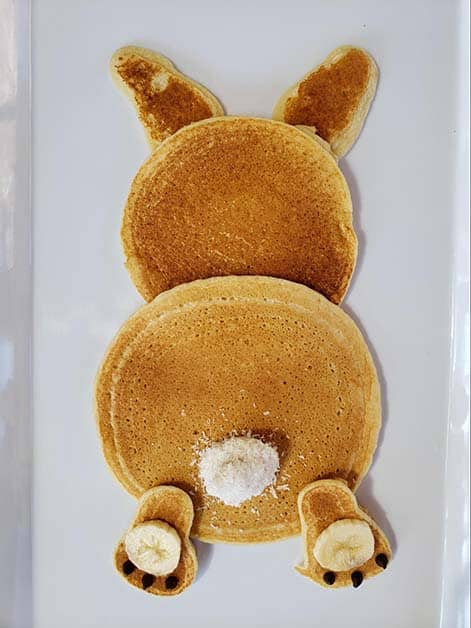
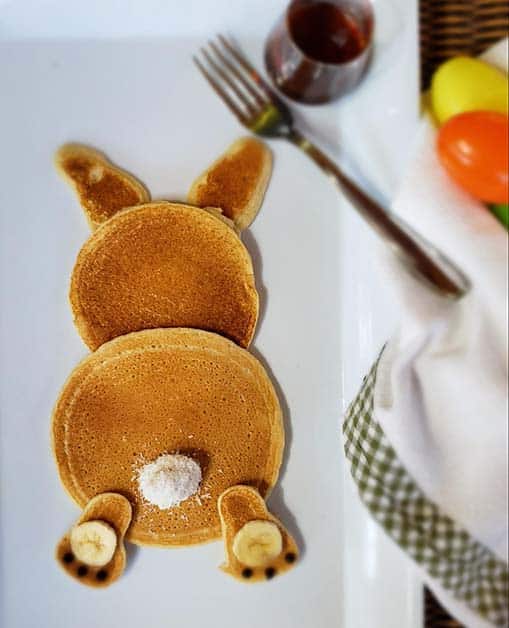
Easter Bunny Pancakes
Your little ones will love these bunny-shaped pancakes served on Easter morning! Or even for any adults channelling their inner-child…no judgements here! Not only are they easy to make, but they are also delicious and a fun way to serve up breakfast!
We made it super easy by using an already made pancake mix that we sell in-store, but if you have a favourite, go-to recipe that you make from scratch and love, you can use that too!

Easter Bunny Pancakes
Ingredients
- 1 cup Xo Baking Co. Gluten Free Pancake & Waffle Mix, Bob’s Red Mill Buttermilk Pancake Mix or your own pancake mix from scratch! (follow instructions if using packaged)
- 2 Nature’s Emporium Organic Eggs
- 2 tbsp Earth’s Balance Soy Free Buttery Spread, melted and cooled (or grass-fed butter)
- 1 cup Silk Unsweetened Coconut Milk (or a milk of your choice)
To decorate:
- 4 tbsp Cha’s Coconut Whipping Cream
- 4 tbsp Shredded Coconut
- ½ Organic Banana (sliced)
- 1 tbsp Enjoy Life Mini Chocolate Chips (semi-sweet)
Instructions
- In a large bowl, using an electric mixer or a whisk, blend all the ingredients together until smooth (mix, eggs, buttery spread and milk). To make different flavoured pancakes, you can also mix in chocolate chips, blueberries or any other flavour you desire.
- Heat a small amount of oil on the griddle or frying pan over medium-low heat. Pour a small amount of pancake batter to form the head of the bunny. Flip when tiny bubbles form on top and cook until the bottom of the pancake is golden brown.
- Repeat with a slightly larger amount of pancake mix for a larger circle to form the bottom (the body of the bunny).
- Then using a squeeze bottle, piping bag or a plastic baggy, form the ears and the paws of the bunny.
- Once you’ve made all the parts, you can start putting together the bunny starting with the ears, head, body and paws.
- Pipe the coconut whipping cream to create the tail and sprinkle some of the shredded coconut on the whipped cream.
- Add a banana slice and chocolate chips to create the paws.
- Serve with maple syrup, buttery spread, fresh organic berries or any other delicious toppings.
*For the ears and paws, you can use a squeeze bottle, piping bag or plastic baggy to make it easier to shape!

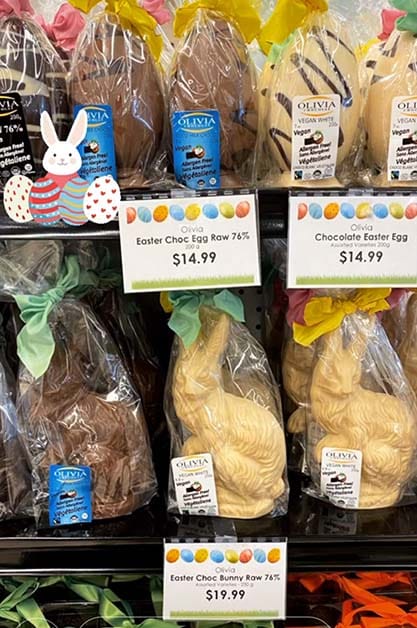
Additional Easter Activities for Families
We also have some more activities that you can do with the kiddos and some yummy treats to indulge in. Add these to your next curb-side order:

We hope you enjoy making these fun Easter food activities with your kiddos and have fun being creative in the kitchen.
From our family to yours, we hope you enjoy your Easter weekend! Make the best of it, even though it might look a little different this year.
More from #ThrivingWithNatures
4 Back-to-School (Healthier) Snack Recipes
School is back in session starting next week! Whether you’re…
Read More
Back To School Healthy Lunches (with Hidden Vegetables for Kids)!
Welcome to Part II of our Back to School Hidden…
Read More
Healthy Breakfasts with Secret Vegetables
It’s the most wonderful time of the year! It’s back-to-school…
Read More